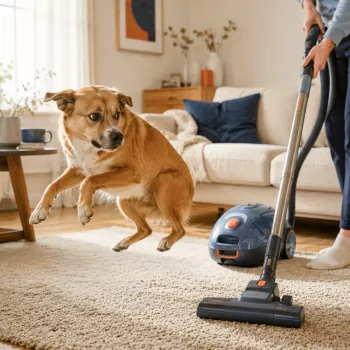
Many pets read the vacuum as a loud, fast, unpredictable intruder. With a few changes to timing, space, and training, most cats and dogs can learn to tolerate vacuuming—or even ignore it—without panic. The goal is steady progress: quieter exposure, predictable routines, and a safe retreat option.
Vacuum fear usually isn’t “stubbornness.” It’s a sensible response to something that hits multiple fear triggers at once.
Some pets show subtle “I’m not okay” signals long before they bark, run, or swat. Catching early signs helps you adjust before stress spikes.
For additional guidance on fear behaviors and humane behavior change, see resources from the American Veterinary Society of Animal Behavior (AVSAB) and the ASPCA’s overview of fearful behavior.
Management is not “giving in.” It’s the foundation that makes learning possible.
This approach pairs desensitization (gradual exposure) with counterconditioning (making the vacuum predict good things). The best pace is the one where your pet can still eat treats and recover quickly.
Park the vacuum in the room, toss treats around it, and end the session while your pet is still relaxed. Keep it short and upbeat.
Roll the vacuum a foot or two without turning it on. Reward calm behavior, then stop before your pet ramps up.
Turn the vacuum on in another room for 2–5 seconds while feeding high-value treats. Then turn it off and pause.
Increase time and decrease distance in small steps. If your pet won’t take treats or can’t relax, you’re too close or too long.
Vacuum one small area, take a break, and repeat later. Several mini-sessions usually work better than one long clean.
If stress spikes: Go back one stage for a few sessions. Progress is rarely linear, especially if there are loud surprises (a bumped chair, a rattling canister, a sudden direction change).
| Stage | What to do | Pet looks ready when |
|---|---|---|
| 1: Vacuum visible (off) | Vacuum sits in room; treat scatter nearby; remove after 1–3 minutes | Approaches treats, loose body, normal breathing |
| 2: Vacuum moves (off) | Roll vacuum briefly away from pet; reward calm; stop | No fleeing/hiding; can watch and disengage |
| 3: Sound at distance | Vacuum on for a few seconds behind a door; feed high-value treats | Eats treats; minimal startle; recovers quickly |
| 4: Sound closer/longer | Increase duration and reduce distance gradually | Settles within 30–60 seconds; body stays loose |
| 5: Normal vacuuming | Vacuum small zones with breaks; maintain safe room option | Chooses to stay relaxed or retreat calmly |
For noise sensitivity background and practical safety tips, the RSPCA’s guidance on fear of loud noises is also helpful.
Consider Helping Pets Handle Vacuum Stress for a step-by-step approach and routine support.
On non-vacuum days, building calm energy outlets can also reduce reactivity. For small dogs who enjoy independent play, the Interactive motion-activated dog ball for small dogs can be a handy way to add movement and enrichment indoors.
No—forcing exposure (often called flooding) can worsen fear and make future training harder. Gradual exposure under threshold, paired with rewards and a safe retreat option, is more likely to build true tolerance.
Start with management: separate your dog from the vacuum using a closed door, crate, leash, or barrier so they can’t rehearse lunging and biting. Then follow a staged desensitization and counterconditioning plan, and consult a certified trainer or veterinary behavior professional if aggression continues.
Many pets improve in days to weeks, but the timeline depends on past experiences, noise sensitivity, and how consistently you practice. Signs of progress include taking treats during brief vacuum sounds, recovering faster after startles, and choosing to relax or retreat calmly instead of panicking.




Leave a comment